Friday 8 November 2013

Christmas Tree made with Paper Rolls - fab with small prints


  • Take a piece of 6x6” paper and cut in half. Do this with 4 or 5 different designs so that your paper rolls will be a mixture of designs.

  • All your paper rolls will be 3” long. You then need 9 rolls, starting at ½” and increasing in size by ¼” with each roll. I'm showing the first few all in the same paper in this example but when I make the trees I vary the designs, laying them out as I go to check how they contrast. Another top tip I learnt was, use stripes vertically not as I have here - cut this way you would lose the stripe once rolled ;-)

  • Using a wooden Kebab stick and your thumb curl the paper along the 3” length a little. Then put double sided tape along the edge furthest from your stick. Now roll the bead nice and tightly.

  • Complete with all 9 rolls. When finished lay them out and measure how tall the tree will be on the card. I then cut High Bond Tape to this length and lay it on the prepared card bank as if it were the trunk. You can add a couple of other strips at an angle if you like, to help hold the rolls. Starting with the longest paper roll, place them seam facing down up along the 'sticky trunk'.

  • Decorate with gems or pearls – Dovecraft Back to Basics do both to match the papers - and then hand draw on the trunk and faux stitching around the white card if you wish.
  • And away you go...

Friday 4 October 2013

Rose Garden

Love the Rose Garden pad: it's made some gorgeous projects. 

But this 12" page has kept looking at me. 

Running a class on paper flowers on Monday so this sheet and others are now punched to pieces.  

We're gonna have some awesome pots of flowers. 
Bit of aged edges and mix and match and there you go. 
More flowers to follow. Looking forward to experimenting with the texture of the canvas sheet and the crackle look from the large rose page. 


Tuesday 18 June 2013

Bouquet pop-up

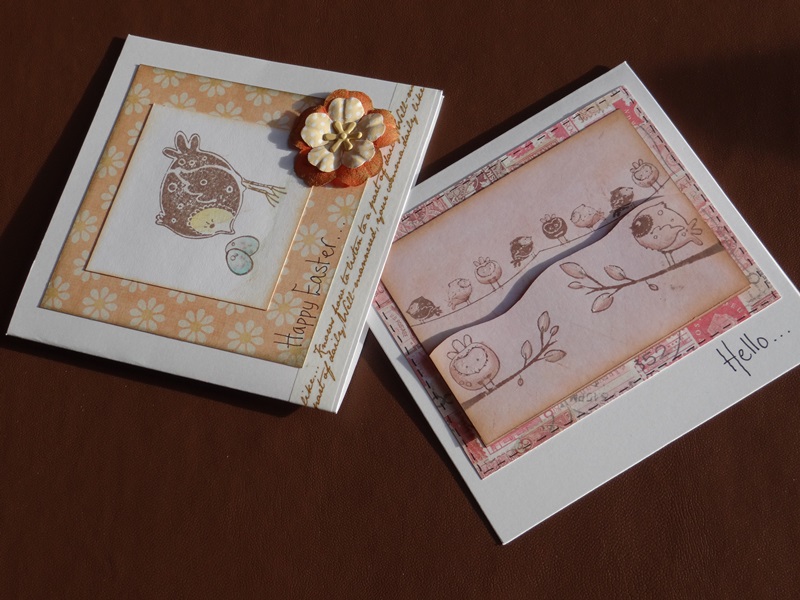
Made this card today for a friend's birthday, and put a pop up inside.
For anyone who has made bird beak pop ups inside a card as a child or with their kids - you'll see where the idea for this one has come from....
And here are a few tips on how I did it...


The main Card is taken from the First Edition 8x8" square paper stack. Fold it in half and you get a perfect DL size card. Use a punch to round the corners and decorate with other pages from the scrummy stack..

Then cut another sheet to 6.5 x 6.5" square and fold in half, pattern side facing in. This will be your insert and will be what you cut the pop up into.
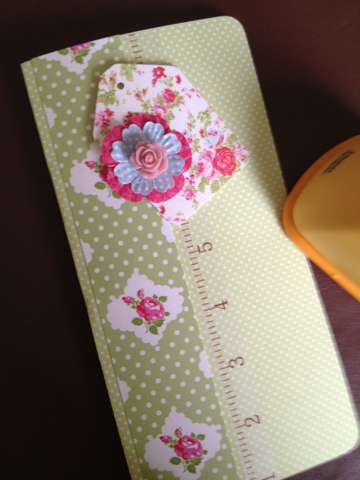
The photo below shows the reverse side after you have done three steps:
 1 - whilst folded draw two pencil lines. The lower one is 1" across and 3" up from the bottom. The higher one is 2" across 3" up from the first line.
 2 - with the card still folded, cut along both pencil lines with scissors. Open out.
 3 - with an embossing tool and ruler score a cross between the two pencil lines i.e. top left to bottom right etc.


Now open out the sheet and crease along your score lines. I run my finger nail along the score line as I push the pop up into place. Work all creases gently before you fold the pop up into place.


Don't stick the lining in place yet. Complete all the decorating first.
Photo below shows you that I have stuck a scalloped circle of acetate behind the pop up, so that I can attach flowers with brads so that they appear above the 'paper wrapping'.
You can add punched leaves, and more flowers inside too if you wish. Just keep testing that wherever you place them you can still close the card shut ;-o


When all is decorated (I added a punched heart behind my flowers, and stitched crochet cotton from Bouquet to tag) you can stick the lining inside. Put double-sided tape on the outer edges, not on the centre fold - you want that to have a little give as the card opens and closes.


Hope the pictures and explanation are helpful.
Good luck to anyone trying this sort of pop up for the Trimcraft Theme Challenge.
Details on www.trimcraft.co.uk/forum

Caroline


Wednesday 5 June 2013

One way to Pop

The theme challenge for June on the Trimcraft website is Pop Ups. 
 So here's my card to get you started and a video with tips on making the pop up involved. 


More pop up ideas to come soon. 
Caroline

Friday 1 March 2013

Birds and Bees and Butterflies too!

Over on the Trimcraft website, I've set the Theme Challenge for March.
Anyone can join in and there is a prize. Closing date is 1 April.

Every shop I look in and my wardrobe too, seem to house clothes and scarves with little critters on. I am wearing my black and cream Lola Rose Bird Scarf as I type.
I just keep falling in love with this trend in the shops.
So I've been having a go at repeating it on my cards. I started off doing multiples and then went on from there.

The Theme is called - Birds and Bees and Butterflies too!

Here are my samples...


I'm gonna start working on next month's challenge now, as there will be a video to go with it, giving you some top tips. Details will be posted here and in the Trimcraft forum at the start of April.

Caroline x

Thursday 14 February 2013

Theme Challenge - Words & Letters

Over on the Trimcraft website, a lovely lady called Christa and I have taken over the monthly theme challenge.

This month the theme is Words or letters as a central feature. (Check out the challenge in the Forum at www.trimcraft.co.uk)


I made cards with words on to start the challenge off, but wanted to do something with a single letter.
Originally I had thought of L for my daughter's name but once I had started to collect the photos together, a better sentiment and letter came to me.

The letter is printed directly onto cardstock from the First Edition "Rose Garden" stack. Just cut a piece of  the 12x12" the width of A4 and pop it in your printer. It's 200gsm and a great weight.
(I test on printer paper first of course!)

The font I have used for the letter is from Scrap n Fonts and is called CK Fairytale Transparent. It cost me $1 to download. I enlarged it in a text box in PowerPoint and then added another text box with 'Your are Beautiful' to float on top.

The hearts, rose plate and swirls are all cut out from designs in the Rose Garden Pad.

I then wrote my journalling around the outside. Cut copy paper to size and write it out first so you know it fits and then write it on the real sheet with your copy sheet below it for guidance. That way you won't run out of room as you go round the page :-)

My words say:
   "As you grow up your are more aware of how the camera captures you. You have your 'photo smile'. But I love all your smiles and think .......  You are Beautiful."

With age comes self consciousness, and a critiquing of every photo we see of ourselves!
So scrapbookers - capture every photo of your young when you can!

The page will be out on the demo circuit with me - details on Trimcraft website.
Caroline
xx