Christmas Tree made with Paper Rolls - fab with small prints
- Take a piece of 6x6” paper and
cut in half. Do this with 4 or 5 different designs so that your
paper rolls will be a mixture of designs.
- All your paper rolls will be 3”
long. You then need 9 rolls, starting at ½” and increasing in
size by ¼” with each roll. I'm showing the first few all in the
same paper in this example but when I make the trees I vary the
designs, laying them out as I go to check how they contrast. Another top tip I learnt was, use stripes vertically not as I have here - cut this way you would lose the stripe once rolled ;-)
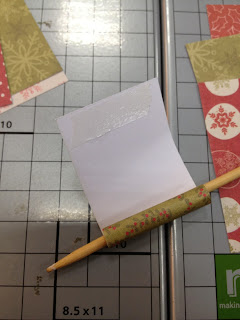
- Using a wooden Kebab stick and
your thumb curl the paper along the 3” length a little. Then put
double sided tape along the edge furthest from your stick. Now roll
the bead nice and tightly.
- Complete with all 9 rolls. When
finished lay them out and measure how tall the tree will be on the
card. I then cut High Bond Tape to this length and lay it on the
prepared card bank as if it were the trunk. You can add a couple of
other strips at an angle if you like, to help hold the rolls.
Starting with the longest paper roll, place them seam facing down up
along the 'sticky trunk'.
- Decorate with gems or pearls –
Dovecraft Back to Basics do both to match the papers - and then hand draw on the trunk and faux stitching around the white card if
you wish.
- And away you go...


3 comments:
fab idea, great for using up scraps.
Oh my! I love it! So simple yet so effective! :)
Post a Comment